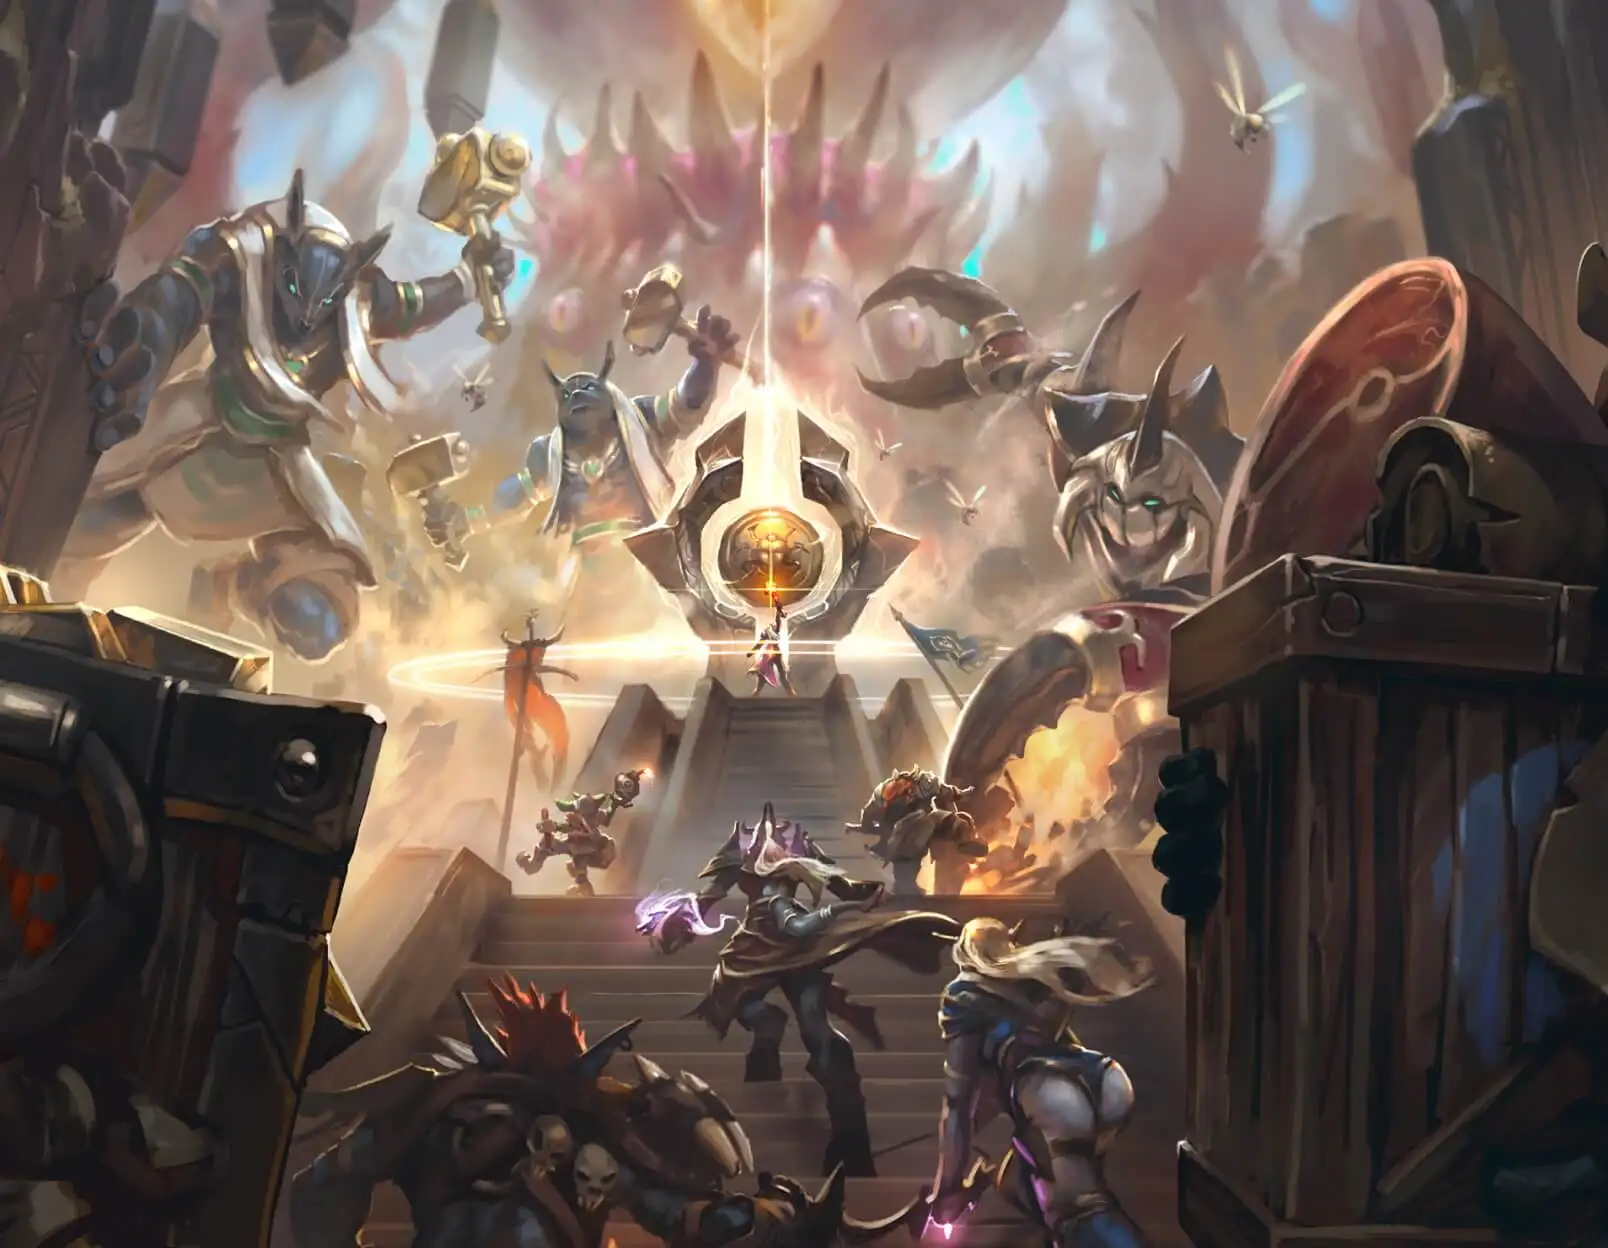
D2 Crota's End Guide
Defeat Crota, son of Oryx with this in-depth raid guide, featuring loadout recommendations and hidden chest locations.

Here is what to expect from this guide:
- Difference between Destiny and Destiny’s 2 Crota’s End.
- Recommended Loadauts.
- Crota’s End Hidden Chests.
- Boss Mechanics.
- Abyss;
- Oversoul Bridge;
- Ir Yut;
- Crota, Son of Oryx.
King's Fall was brought back during Destiny 2's Witch Queen expansion, giving newer players a chance to slay the Taken King himself. But before we got Oyrx's attention, there was Crota. Oryx's son had a dedicated raid in the original Destiny, and it's been brought back in Destiny 2 with a complete overhaul.
Veteran players who remember Crota's End being a glorified dungeon will be surprised by this raid's difficulty. Some new mechanics were added, revised some older ones, and significantly ramped up the enemy density of this raid, making it one of Destiny 2's hardest raids to date. This guide will showcase every change made to Crota's End, how to beat every encounter, and where to find every hidden chest.
Differences Between Destiny And Destiny 2 Crota's End

General Mechanics
- The Chalice of Light buff from the Crota encounter is now a core mechanic, functionally identical to brands in D2 King's Fall. Chalice holders will passively charge the buff on kills.
- When full, it must be grabbed by someone else in 10 seconds or the Chalice wielder dies.
- When passed, the previous Chalice holder will gain the "Enlightened" buff, allowing them to interact with raid mechanics. This buff has no timer.
- Swordbearers and Gatekeepers are significantly tougher.
- Enemy density has been significantly increased.
- Barrier and Unstoppable Champions are present.
Abyss Changes

- Players must consume an Enlightened buff—obtained by swapping a fully-charged Chalice of Light—to activate each lantern.
- Some lanterns have pedestals that require the Chalice of Light buff.
- The path is dotted with pendulum traps from the Pit of Heresy.
- Unstoppable Ogres spawn while constructing the bridge.
Oversoul Bridge Changes

- Five Hive Swords must be dunked near the gate before Ogres spawn. This prevents cheesing the encounter with deaths or Strand.
- You must be Enlightened before you can pick up a Hive Sword. Doing so consumes the Enlighten buff.
- If you drop the Sword at any point, you will not be able to pick it back up.
- Chalice of Light users may cross the bridge alongside Sword wielders.
- Gatekeepers are accompanied by an infinite wave of adds.
- It is highly recommended that Sword and Chalice players cross the bridge together.
- After killing the Ogres, six Gatekeepers will spawn. Grab the Hive Swords your team dunked to kill them. Once slain, deposit the Chalice of Light to end the encounter.
- Barrier Knights spawn throughout the encounter.
Ir Yut Changes

- Wizards now spawn in isolated towers that require the Enlighten or Chalice buffs to enter. All Wizards must die before Ir Yut becomes vulnerable.
- The towers adjacent to Crota's Oversoul have two spawn locations for Wizards, one on each floor.
- Shriekers can also spawn in these locations and should not be slain.
- An additional Wizard spawns per successful DPS phase. Three spawn by default.
- The wipe timer begins when any Wizard dies. Synchronize Wizard kills to maximize your damage window.
- Dark Liturgy, your DPS window, lasts for 45 seconds. If you don't remove 25% of Ir Yut's HP before the timer runs out, your fireteam wipes.
Crota Changes

- Swordbearers spawn once both towers are cleared of Boomer Knights.
- The Sword's role has been inverted. You now use the Sword to break Crota's immunity shield, starting the DPS phase.
- The Chalice of Light must be swapped between players to give Enlighten, allowing your fireteam to pick up Swords.
- The Enlighten buff may be expunged on Crota during the DPS phase to deal additional damage.
- The Oversoul is now a wipe mechanic that occurs mid-DPS phase. An Enlightened player must shoot the Oversoul to prevent a wipe.
- Crota's final stand sets the Oversoul's wipe timer to 15 seconds. It can be extended by shooting it as an Enlightened player.
- Presence of Crota no longer disables healing for non-Chalice holders.
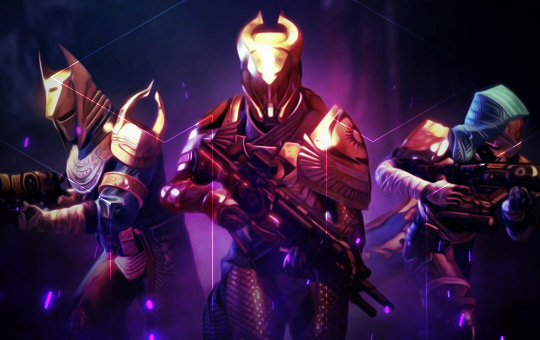
Recommended Loadouts
| Subclasses | ||
| Hunter | Warlock | Titan |
| Nightstalker | Dawnblade | Sunbreaker |
| Revenant | Stormcaller | Sentinel |
Hunters can make nearly every subclass work here. Arcstrider is a solid option for boss DPS if you use Star-Eater Scales and Gathering Storm, but we're going to focus our recommendations on survivability and general group utility. Nightstalker excels here, capable of deleting entire hordes of fodder enemies with Gyrfalcon's Hauberk and a good Void weapon like Graviton Lance. Stylish Executioner also lets you quickly deduce where the Wizards are located in the Ir Yut encounter. If your team is attempting this on Master difficulty, Revenant can keep your team alive by using Renewal Grasps. Focus on Duskfield Grenade uptime, and you can make the first half of this raid a complete breeze.
Warlocks shouldn't be surprised that we're recommending Dawnblade for this raid. Well of Radiance is the strongest Super in the game for endgame PvE content, allowing you to completely neglect incoming damage while buffing your team's outgoing damage. If you want a more active subclass, Stormcaller with Vesper of Radius can trivialize this raid's combat difficulty. Your Rifts will kill red bars, and blind yellow bars, and buff your team with Arc Souls. It won't dethrone Well of Radiance on its own, but a good Stormcaller can single-handedly cover add clear for your party. Woohoo! You've also found a special promo-code. Use BLOG7 to get 7% OFF on your first boosting service!
Titans tend to use Sunbreaker for endgame PvE content, and Crota's End is no different. Throwing Hammer can two-tap Knights on Contest difficulty while x3 Roaring Flames and Synthoceps are active. Sunspots will ensure you never die, and Burning Maul can be used to stunlock Crota during his DPS phase. You can also equip Pyrogale Gauntlets to morph your Burning Maul into a beefy one-and-done Super. If your team needs more survivability, you can either equip Phoenix Cradle or use Sentinel to give your fireteam Void Overshields. Ward of Dawn is also an invaluable Super for Crota if your team prefers to use Shotguns and Swords for the DPS phase.
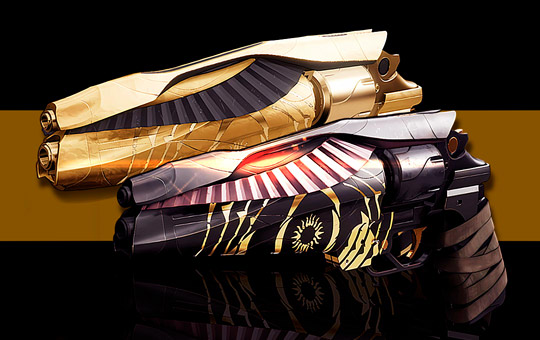
Weapons
| Weapons | ||
| Kinetic | Energy | Power |
| Shotguns | Graviton Lance or Sunshot | Lament |
| Blinding GL | Forbearance | Rocket Launchers |
| Wish-Ender | Fusion Rifles | Machine Guns |
Since most Energy weapons tend to house Destiny 2's best add-slaying weapons, we're going to focus on utility and DPS for the Kinetic slot. Shotguns are generally worth bringing to Crota's End since most encounters take place in close quarters. Conditional Finality, Until its Return, and Heritage are a few good options. You'll also want to consider Blinding Grenade Launchers to disorient Swordbearers and Gatekeepers. Chalice carriers should use this or Tractor Cannon to give Sword wielders some much-needed breathing room. Finally, readers for Ir Yut should bring Wish-Ender. The weapon's wallhack mechanic while ADS allows you to find hidden Wizards at a glance, making DPS setup much easier. It also counters Barrier Champions found in the Oversoul Bridge encounter.
For Energy weapons, you can't go wrong with Forbearance as a general add-slaying option. A roll with Ambitious Assassin and Chain Reaction makes short work of everything. If you prefer Primary weapons, we highly recommend Graviton Lance and Sunshot. Both weapons cause targets to violently explode on death and deal great damage against majors. For those using their Kinetic slot to clear adds, bring a Fusion Rifle for backup DPS. Some good options include Cartesian Coordinate, Techeun Force, Eremite, and Royal Executioner.
Heavy weapon recommendations boil down to three categories: Rocket Launchers, Machine Guns, and Swords. Rockets are viable in Crota's End and the ideal weapon archetype for Ir Yut, although they are incredibly dangerous to use against Crota due to how the encounter is structured. For Crota specifically, Swords are ideal. Mechanics in that encounter highly encourage your party to fight him up close, so we recommend you bring Lament or your best Sword. Finally, Machine Guns are amazing for killing Champions and Swordbearers in the first two encounters.
Crota's End Hidden Chests
Guaranteed Deepsight Chest
Crota's End features a hidden chest that always drops a Deepsight weapon, claimable once per week. At the very start of Crota's End, look along the edge of the Hellmouth to find three pairs of statues. Each pair will have one lit statue. Record which statue is lit, either the left or right; each pair corresponds with another set of statues you'll find later in the raid. You must activate the statue on the side that matches the lit statue you saw atop the Hellmouth. Light all three pairs correctly, and the red border chest will spawn once you slay Crota.
The Hive statues can be found in the following locations:
- Bridge: Found on the left and right-most towers of the lower platform (where you start the second encounter from).
- Bridge: After you beat the bridge encounter, head to the left and right-most corners of the upper platform.
- Crota: After beating Ir Yut, run outside the Rally Flag room, turn around, and jump up the platform. The statues will be to your left and right.
- These statues are inverted. The statue on your left is actually the right statue and vice versa.
Hidden Chest #1: Abyss
The first hidden chest spawns inside glowing doors within the Abyss encounter. Throughout the encounter, you'll walk by multiple Hive doors emitting a faint light. You'll need to enter each door to see if the hidden chest is present. Unless most hidden chests in Destiny 2, this chest is actually on the encounter, but at the time it spawns only in the very farthest room.
Hidden Chest #2: Shrieker Hallway
The second hidden chest can be found in the Shrieker hallway right after the Oversoul Bridge encounter. You must clear the Shrieker Hallway as quickly as possible, seemingly under 60 seconds. Once you deposit the Chalice, a door should open directly across from the pedestal. Walk through the door to find the chest.
Hidden Chest #3: Unknown
Stated by the triumph of the Crota’s End raid seal there is a 3rd chest, which will complete the triumph and provide players with a shader. However d2 community still hadn’t been able to find it.
Fan fact that in the original game, there was also a 3rd chest that was never found and has been treated like an in-game bug. We are confident that this time there is a 100% hidden 3rd chest, and most likely timegated or will somehow appear on Master difficulty.
Abyss
Encounter Synopsis
- Navigate a labyrinth of traps by lighting Hive lanterns.
- Grab Chalice of Light. It charges over time.
- When full, have someone grab the Chalice. This will buff the previous Chalice player with Enlightened.
- Enlightened users can power Hive lanterns.
- Some lanterns have pedestals that accept the Chalice. Dunk it to unlock future lanterns.
- At the end of the labyrinth, power a Hive plate with Enlighten buffs to reveal the exit.
- Unstoppable Ogres are present.
Encounter Overview
Crota's End begins at the lip of the Hellmouth, a massive Hive structure on the surface of the Moon. Your fireteam will begin by grabbing the Chalice of Light floating above a pedestal. This buff will slowly charge over time, accelerated if your fireteam lands kill near the Chalice carrier. When the Chalice is full, another member of your fireteam must claim the buff within 10 seconds, or else the Chalice carrier dies. Grabbing the buff can be done by looking at the Chalice player and holding the interact key, the same as the brand mechanic in King's Fall.
Whoever grabs the Chalice will become Enlightened, a buff with an infinite duration that allows you to perform raid mechanics. In the opening section, you'll use Enlighten to charge Hive plates and lanterns. Charge the plate in front of the Chalice pedestal to form a bridge above the Hellmouth. Once formed, run to the end of the bridge and jump down the gravity lift to reach the abyss.
The depths of the Hellmouth are shrouded in darkness that can only be extinguished through stationary lanterns that dot the path. Start the encounter by grabbing the Chalice buff. Your fireteam will need to reach the nearby lantern and light it. Each second while in the abyss, you'll gain stacks of Weight of Darkness, reducing your movement speed with every stack. At x10 stacks, you will be unable to sprint or slide, although abilities and Eager Edge Swords will still work. Another debuff called Engulfed in Darkness will also appear, lasting 60 seconds. If this timer hits zero, your fireteam wipes. You must ignite lanterns and deposit the Chalice at pedestals to reset the Engulfed in Darkness timer.
Thankfully, lighting a lantern is quite straightforward. Use the Chalice of Light to create the Enlighten buff, then light the lantern. This will reset the wipe timer and slowly decrease your party's Weight in Darkness stacks while standing in the light. But beware: lit lanterns will explode after 10 seconds. You'll want to slowly traverse the abyss with your group in tow, lighting lanterns while continuously swapping the Chalice buff. Beware of pendulum traps and bottomless pits. Some lanterns will also have a Chalice pedestal that accepts the Chalice of Light. You'll need to interact with these to light the way forward. Pedestal locations are randomized, so keep your eyes peeled.
At the very end of the labyrinth, your party will stumble across a massive gap and a Hive plate. You must use the Enlighten buff to power the plate. This will slowly create a bridge. Have one person stand on the plate while everyone else kills adds. Unstoppable Ogres will spawn, so have a Champion counter ready. The plate will flash when the bridge is finished. Cross the massive gap, slay any adds you find, and cross the blinding light to reach the next encounter.
Oversoul Throne Bridge
Encounter Synopsis
- Split your team into pairs, one for each plate.
- Stand under the Annihilator Totems at each side to prevent a wipe mechanic.
- Grab the Chalice of Light to Enlighten allies via buff swaps.
- Enlightened players can grab a Sword or charge the bridge plate.
- Bridge forms at 3 Enlightens.
- Recommended to Enlighten 5 Guardians before escorting a Sword (Enlighten strategy).
- Chalice and a Sword user will cross together. Sword user must slay a Gatekeeper Knight and deposit a Sword.
- Chalice user slays adds and either deposits their buff (Enlighten strategy) or runs back (Escort strategy).
- Repeat until five Swords have been deposited.
- Slay the multiple Gatekeepers that spawn. Deposit the Chalice buff when finished.
- Barrier Knights are present.
Roles
| Chalice | Enlightened | Sword |
|
|
|
Encounter Overview
Crota's Oversoul Bridge has seen a complete overhaul from the original Destiny, morphing this encounter into a buff-swapping dance that places major emphasis on clear callouts, good add clear, and general situational awareness. No boss is present in this encounter, so feel free to run a Machine Gun or an Exotic Primary. Thunderlord, Sunshot, and Graviton Lance are great options. Barrier Champions are also present, so be sure you have a means of countering them. Solar users can proc Radiant to give their weapons Anti-Barrier Rounds.
Picking up the Chalice of Light near the center of the platform will start the encounter. Assign your team into pairs and split them off to each plate: left, middle, and right. The left and right sides have plates with massive metallic structures hovering above them. These are Annihilator Totems and, when fully charged, will wipe your fireteam. Have at least one player stand under each totem to prevent them from charging. The middle plate is responsible for creating the bridge. You'll need to empower it with multiple Enlightened buffs before the bridge will form.
The Chalice and Enlightened buffs work the same as the previous encounter, so you'll want to swap the Chalice buff between your fireteam. There are two strategies you can use here:
- Escort Strategy: Chalice users focus on buffing a select few people to start, charging the bridge as soon as possible. Once charged, they escort Sword wielders to and from the bridge, swapping sides regularly.
- Enlighten Strategy: Chalice users will Enlighten five Guardians before grabbing a Sword. They will then run across the bridge with a Sword user and deposit their buff, grabbing it when needed.
We're going to use the Enlighten Strategy for this guide, as we find this method to be far easier and LFG-friendly than the escort strategy. Bear in mind that this strategy does not work if your group repeatedly dies. If you're in a sherpa group or playing with less experienced raiders, we recommend the escort strategy.
Once the bridge plate is charged, Swordbearers Knights will begin to spawn. These enemies will drop a Hive Sword when slain, a pickup that's required to slay the Gatekeeper Knights waiting for you on the other side. Only Enlightened players may pick up a Sword, and doing so will consume your buff. This means that if you drop the Sword at any point, you will not be able to pick it back up. Have that player wait for the fifth and final Guardian to become Enlightened.
Now that your fireteam is mostly Enlightened, it's time to cross the bridge. Have your Chalice player and Sword user cross the bridge together. You'll find a Gatekeeper Knight and a small pack of adds on the other side. This Gatekeeper Knight only receives damage from Hive Swords, although they are susceptible to debuffs like Weaken and Blind. Have the Sword user slay the Gatekeeper while the Chalice player kills the adds. Additionally, the Chalice player must also deposit their buff as soon as possible, as your partner will not have enough time to grab the buff from you. You can do so at a pedestal found just before a massive Hive gate. Meanwhile, the Sword user will slay the Gatekeeper to unlock nearby sword pedestals. Deposit the sword into a pedestal to preserve it for later.
This pair will now be stationed on the other side of the bridge, fending off waves of adds as the initial side waits for another Swordbearer to spawn. Kill the Swordbearer, grab the Sword, and cross the bridge. There should now be three people on each side of the bridge. When three people are on the upper floor, have someone grab the Chalice of Light buff again. You'll need to activate the Annihilator Totems on that side to get your last three fireteam members across.
Create the Enlightened buff once, deposit the Chalice buff at a pedestal, and then have the Enlightened player activate the bridge plate on the upper floor. This will flip the totems to the opposite side. Each player should now be standing on a plate, either on a bridge plate or under an Annihilator Totem. The lower floor Guardians can now get off their plates. The new goal for the lower floor is to grab a Sword, cross the bridge, kill the Gatekeeper, and repeat until everyone's across.
When all Guardians are on the other side, grab the Chalice buff one more time and start making Guardians Enlightened. This will cause some Ogres to spawn, one on each side. Slaying the Ogres will then spawn six Gatekeepers and a handful of Hive Swords. Enlightened players will then grab the Swords to take care of them. Deposit the Chalice buff once all the Gatekeepers are dead to finish the encounter.
Reaching Crota's Chamber
This combat section requires you to fight through a hallway of Hive protected by magical forcefields. To cross the forcefield, you must be Enlightened or be carrying the Chalice of Light. If you fit either condition, cross the field and kill the Shrieker to remove the Hive magic. Repeat this process until you reach the other side, then deposit the Chalice of Light on the pedestal to stop the Hive enemies from spawning.
Ir Yut
Encounter Synopsis
- Split your team in half. Each group covers a side (left or right).
- Kill every Blistered Knight and Shrieker to open the Chalice of Light platform.
- Locate the Wizards hidden behind Hive forcefields.
- This can be trivialized with Wish-Ender or Nightstalker's Stylish Executioner Aspect.
- Some spawn locations will have Shriekers instead. Do not kill them.
- Buff your team with Enlightened to reach the Wizards. Kill them simultaneously to start DPS.
- Remove 25% of Ir Yut's HP before Dark Liturgy expires.
- DPS phase lasts for 45 seconds.
- Leftover Enlightened buffs can be expunged on Ir Yut, dealing massive damage.
Roles
| Chalice | Reader | Enlightened |
|
|
|
Encounter Overview
Ir Yut is a fairly straightforward boss encounter that requires good coordination. Before you start, decide who will be your team's reader. Starting Ir Yut's DPS phase will require your team to locate a few Wizards hiding in preset locations. You can do this by listening for the Wizard's Deathsong and from your radar, but there's a much easier way: the reader can use Wish-Ender to quickly see where the Wizards are hiding. The Stylish Executioner Aspect on Nightstalker works as well. We'll cover these hiding spots in a moment. Everyone else will want to use Rocket Launchers or Swords.
Start the encounter by running outside the chamber. Have each group split off to the left and right. You'll want to kill every Blistering Knight on the way there. Use your abilities or Special to quickly melt them. Both teams will need to clear out their side's respective corridor on the southern end of the throne room, protected by Knights and a Shrieker major. Kill the Knights to open the Shrieker's eye, then destroy it to drop the forcefield. This will reveal a central room where the Chalice of Light is being stored, along with a direct sightline to Ir Yut herself.
Before you can kill Ir Yut, you'll need to slay her Wizard acolytes first. Your reader must check for three Wizards that can spawn in seven different locations. Each location can spawn either a Wizard or a Shrieker. Wizards appear as red segments on your minimap, while Shriekers appear as red dots. Do not kill the Shriekers, as this will start the DPS phase early without dropping Ir Yut's immunity shield. The good news is that you can use Wish-Ender to quickly check these spots to see where the Wizards are located. Exact spawn locations can be found on the map below:
- Northwest Tower (Upper Floor).
- Northwest Tower (Lower Floor).
- Southwest Tower.
- Platform above the Chalice of Light.
- Southeast Tower.
- Northeast Tower (Upper Floor).
- Northeast Tower (Lower Floor).
Once the reader figures out the Wizard spawn locations, it's time to prepare. Have your Enlightened players run to each Wizard location and run through the forcefield. Coordinate your fireteam to kill every Wizard at the same time. Once a Wizard dies, the Dark Liturgy debuff will appear on your HUD, lasting for 45 seconds. This is a wipe mechanic that acts as your DPS window. Have everyone meet up at the Chalice platform to damage the boss. The Chalice holder can also deposit their buff at a pedestal just before fighting Ir Yut to prevent juggling it mid-DPS phase.
Ir Yut DPS Phase
Killing every Wizard will drop Ir Yut's immunity shield, allowing you to damage her with the remaining timer on Dark Liturgy. You must remove at least 25% of Ir Yut's HP before Dark Liturgy expires. Now is the time to use your Supers and Heavy ammo to melt her HP. Any remaining Enlightened players may also expunge the Enlighten buff on Ir Yut. This deals a sizable amount of damage and makes the DPS check much easier.
If successful, Ir Yut will stop her Deathsong and retreat, resetting the encounter. Repeat the process until Ir Yut is slain. Bear in mind that an additional Wizard spawns after every DPS phase, so you'll need to Enlighten one additional player after every phase.
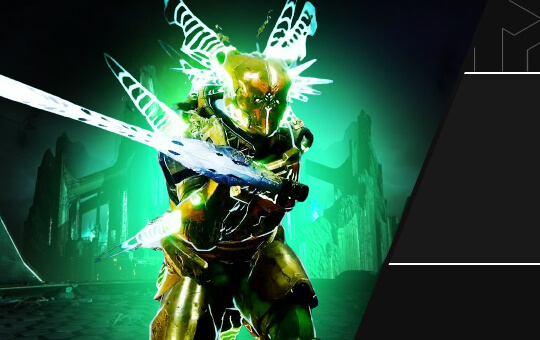
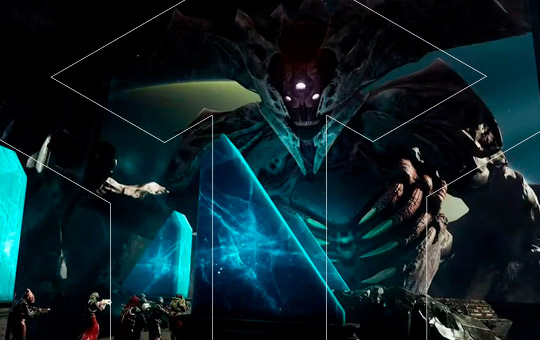
Crota, Son Of Oryx
Encounter Synopsis
- Split your team in half. Each group covers a side.
- Swap the Chalice of Light buff to make players Enlightened.
- Swapping must now be done in Pools of Light scattered across the arena.
- Kill Hive Knights atop towers to spawn a Swordbearer.
- Enlightened players will grab Swords to damage Crota's shield.
- Break Crota's shield to start the DPS phase.
- An Enlightened player must damage the Oversoul near the end of DPS to prevent a wipe.
- Other players can also expunge their Enlighten buff on Crota for extra damage.
Roles
| Chalice | Enlightened | Sword |
|
|
|
Encounter Overview
Defeating Crota will require you to use his very weapon against him. This encounter is a hybrid between the Ir Yut boss fight and the Oversoul Bridge encounter. Your group must grab Hive Swords to break Crota's shield, allowing you to damage him. Before you start the encounter, we highly recommend that all Warlocks switch to Well of Radiance, and every player swaps to a close-range weapon like Lament or Legend of Acrius.
Crota is a boss that is best fought in close quarters, and you'll need multiple Wells to survive the overwhelming amount of damage the Hive Knights and Crota himself will dish out. Equipping Melee Resistance and Arc Resistance mods on your chest armor is also highly recommended.
Start the encounter by huddling near the jade crystal at the center of the chamber. Split your team in half, one group for each side. This will power the Oversoul, a shattered eye of sorts that hangs over Crota's throne. Keep this in mind as you start Crota's DPS phase, as someone will need to shoot it later. For now, fight your way out of the chamber and claim the Chalice of Light in the central combat pit.
With the Chalice in hand, your fireteam's goal now is to create Enlighten buffs and spawn Swordbearers, similar to the bridge encounter. Swordbearers will always spawn after you defeat two pairs of Boomer Knights, each located in a tower adjacent to the Oversoul—found in towers 1/2 and 6/7 from the Ir Yut encounter. They always spawn on the upper floor. Swordbearers are accompanied by two Ogres and a small group of Thrall, so make sure your team is safe before killing the last Boomer Knight.
Slaying all four Boomer Knights will spawn the Swordbearer right next to the Chalice of Light's spawn location, located just under the Oversoul gate. Kill the Swordbearer, have an Enlightened player grab their Sword, and then use the Sword to damage Crota. Use the Sword's Super and heavy attack slams to deal some solid damage. You'll need 2-3 Swords to break Crota's shield, potentially just one if your fireteam debuffs Crota with Tractor Cannon or Shadowshot. Repeat the process until Crota is vulnerable. Be sure you have at least one spare Enlighten buff before starting the DPS phase, preferably two; you'll need one for the Oversoul and another to expunge. The Chalice user can also deposit their buff at a pedestal before fighting Crota if juggling the buff is too stressful. The pedestal can be found just in front of the spawn location for the Ir Yut encounter.
Crota DPS Phase
Unlike Ir Yut, there isn't an HP threshold your team needs to hit to prevent a wipe mechanic, but you only have four tries before Crota will Enrage and wipe your fireteam, the same as any raid boss. The second Crota's shields are down, deploy a Well of Radiance and start damaging him. Most groups in Contest Mode deployed their Wells right under Crota and used Lament to damage him, as this makes expunging the Enlighten buff fairly easy. This isn't the only strategy you have to use—Rocket Launchers work just fine if you attack Crota from spawn—but it's the most popular.
While your fireteam is fighting Crota, the Oversoul debuff will appear on your HUD, lasting 30 seconds. This is your DPS window. If that reaches zero, your team wipes. An Enlightened Guardian must shoot the Oversoul eye to prevent a wipe. Aim to shoot the Oversoul when it reaches five seconds to maximize your damage window. Crota also deals an immense amount of damage, capable of breaking Wells with two slam attacks on Contest Mode (likely five or six slams on Normal), so have a backup Well or Ward of Dawn ready. Damage Crota, break the Oversoul, and repeat the encounter until you reach the final stand.
When Crota reaches 25% HP, he will enter a final stand. The Oversoul will begin to grow and overpower your Light, giving you 15 seconds to kill Crota before it explodes. If someone is Enlightened, they can shoot the Oversoul, adding 10 seconds to the timer. Have one player reserve their buff for the Oversoul. Everyone else should expunge the Enlightened buff on Crota to deal as much damage as possible, then quickly melt his health bar with Heavy weapons and Supers. Slay Crota, Son of Oryx to beat the Crota's End raid.

Starts at
$8
Starts at
$37

Starts at
$18
Starts at
$15$20
$4
Starts at
$38$62
Starts at
$11
Starts at
$9
Starts at
$72
Starts at
$13.5

Starts at
$30
Starts at
$12

Starts at
$9.6
Starts at
$14
Starts at
$18
Core Principles
Why Choose Us?
We are constantly improving our services to deliver mind-blowing experiences to our customers for every order, every day
Rated 5 Stars
On REVIEWS.io
Check out our reviews on REVIEWS.io, an independent reviews platform. All reviews are genuine and published in real time.
Read customer reviews
We will contact you and start working on your order within 7 minutes

Every manager, even the owner, has successfully personally completed over 300 orders

P.S. We'd better miss a $10,000 sale, than risk your account