Gnomeregan Raid Guide in WoW Season of Discovery
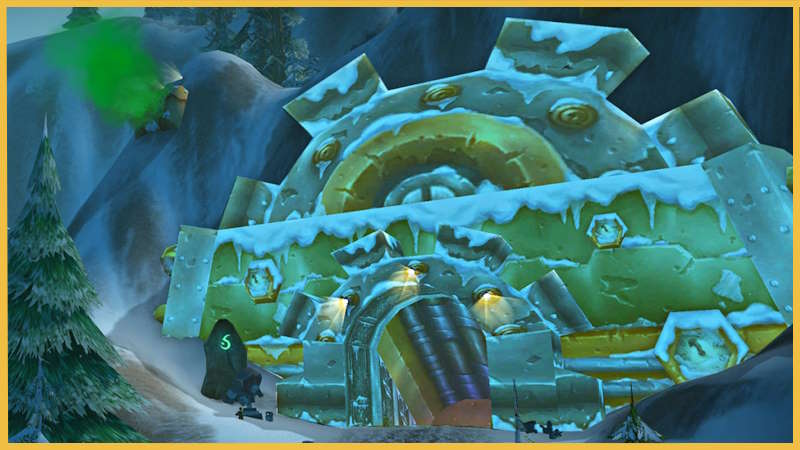
Prepare to revisit the former capital of gnomes once again in a new and improved version of Gnomeregan. What once was a dungeon is now a fully-fledged raid for players to experience in Phase 2 of Season of Discovery. You can enter the raid at level 40 (which is a level cap for SoD Phase 2).
The SoD version of Gnomeregan features 6 bosses, as well as new loot and mechanics that were not previously present in this dungeon. The raid is on a 3-day lockout, much like the previous phase’s main raid. However, it is worth keeping in mind that the first two lockouts are 7 days long.
How to get to Gnomeregan in Season of Discovery
Getting into Gnomeregan as an Alliance character is extremely easy since Gnomeregan is located on their territory. However, this doesn’t mean that getting into Gnomeregan as Horde is impossible. Here is how you get to Gnomeregan as Horde in Season of Discovery:
- Travel to Orgrimmar and enter the Engineering shop there.
- Talk to Sovik and accept the quest called Chief Engineer Scooty (you need to be at least level 20).
- Travel to Booty Bay and find Scooty near the docks.
- Accept a follow-up quest called Gnomer-gooooone! and you'll get transported to Gnomeregan!
As you can see, you can get to Gnomeragan easily, no matter if your character is Horde or Alliance.

All Gnomeregan Bosses in Season of Discovery
There are a total of 6 bosses introduced with the Gnomeregan raid in Season of Discovery. Each one of them boasts new and reworked moves and requires unique strategies to overcome. Here is the list of all bosses from the SoD version of Gnomeregan.
Gnomeregan Raid Boss List:
- Grubbis;
- Viscous Fallout;
- Electrocutioner 6000;
- Crowd Pummeler 9-60;
- The Mechanical Menagerie (New addition to Gnomeregan);
- Mekgineer Thermaplugg.
If you are interested in strategies and specific approaches that each of the bosses requires, we have prepared the next section of this guide for you!
SoD Gnomeregan Boss Tactics
In this section of the guide, we will go over the tactics and strategies for all Gnomeregan bosses.
Grubbis
The encounter with Grubbis involves defeating waves of Troggs before facing the boss Grubbis himself, as well as his pet Chomper. A tank can handle both of them, but if necessary, Chomper can be kited with the help of abilities like Hamstring or Frost Shock.
Throughout the encounter, Troggs spawn continuously, requiring players to lure them into gas clouds to quickly deal with them. Melee DPS should move away during Grubbis's Radiation and leave entirely during Grubbis Mad, while ranged players can avoid these mechanics by staying at a distance.
Viscous Fallout
The tank should kite Viscous Fallout after each Sludge spawn to protect melee players from unnecessary damage. Ranged should maintain a safe distance to avoid nature damage from Irradiated Goo. After the boss casts Summon Irradiated Goo, players should prioritize killing as many of goos as possible; some groups may eliminate all three before they transform into Desiccated Fallouts, while others may only manage one.
If Desiccated Fallouts emerge, interrupting their Radiation Burn is crucial to prevent widespread nature damage. Repeat this cycle of kiting and managing Goo until the boss is defeated.
Electrocutioner 6000
The focal point of this encounter is effectively managing Static Arc. When a player is struck by Static Arc, they receive a debuff that ensures another hit within 20 seconds will result in their demise. To mitigate this, the raid should stack beneath the boss, with only one ranged DPS positioned outside to consistently absorb Static Arc. Once the designated player is hit, another takes their place.
Equally critical is preventing Static Arc from chaining to players already afflicted by the debuff. To achieve this, players divide into two groups: those without Static Arc position themselves on the boss's right leg, while those with the debuff occupy the left leg.
Magnetic Pulse targets a random player, causing nature damage to nearby allies. Affected players should promptly move away from the raid, ensuring they remain within reach for healing but avoid becoming the next target for Static Arc.
Crowd Pummeler 9-60
In the encounter with Crowd Pummeler 9-60, the tank should position the boss at the center of the platform, while ranged DPS should spread out along the perimeter. The key to success lies in dodging the boss's frontal attack, Gnomeregan Smash, and quickly moving gears that roam unpredictably around the platform. Getting hit by either of these can result in being knocked off the platform, leading to certain death.
In addition to avoiding these mechanics, healers must vigilantly monitor whoever is targeted by The Claw! and apply continuous healing to them to ensure their survival.
The Mechanical Menagerie
This encounter is completely new to Season of Discovery and requires players to battle four bosses simultaneously, ensuring their health is brought down evenly. Should one boss's health reach zero, players have a mere 30 seconds to defeat the remaining three before their health regenerates to 30%.
Central to the encounter's positioning is the STX-13/LL, or the Sheep boss. Coming too close to the Sheep results in being silenced and suffering heavy nature damage. To counteract this, the Sheep should not be tanked, allowing it to slowly approach the raid. By kiting the other three bosses in a circle around the Sheep, and moving whenever the Sheep draws near, players can keep it centered in the room. This strategy of continual movement also helps mitigate the lingering fire left by the Dragon boss's Slag Embers.
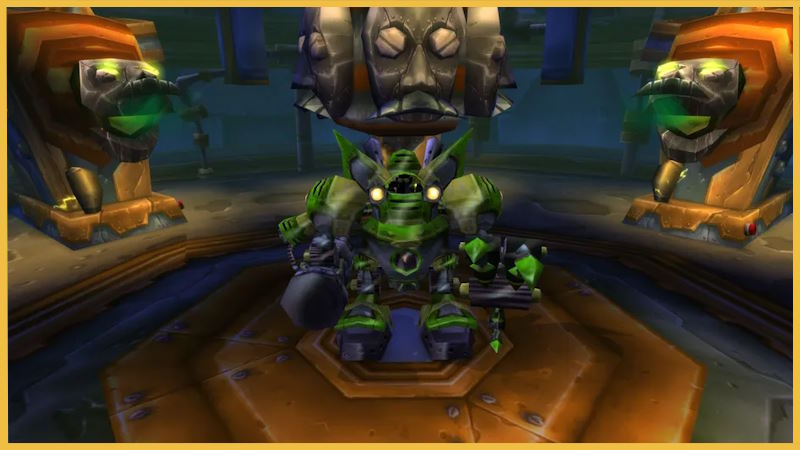
Mekgineer Thermaplugg
The encounter with Thermaplugg is a complex and multi-phase battle, demanding endurance and coordination to overcome. Players must navigate through a series of phases, including Fire, Ice, Poison, and Ultimate, each presenting unique mechanics and heavy raid-wide damage. Phase transitions occur when Thermaplugg's health reaches 50%, except for the Ultimate Phase, where victory is achieved by reducing his health to zero.
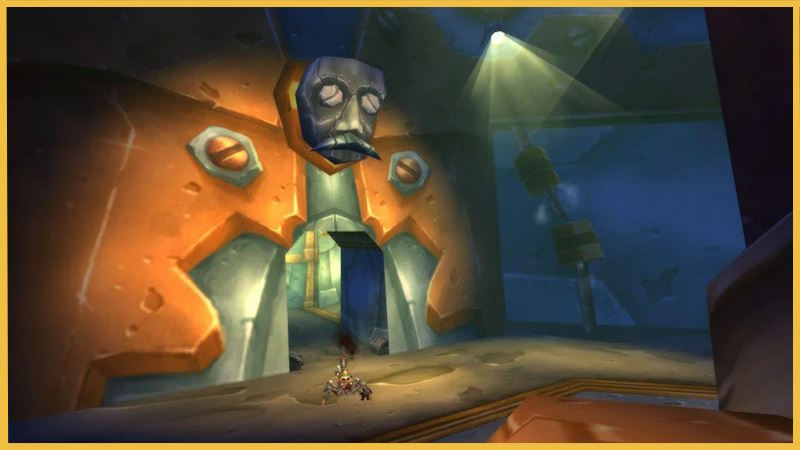
A central mechanic throughout the encounter is managing the bombs spawned from six dispensers within the arena. Periodically, a glowing face above a dispenser indicates impending bomb spawns, requiring a player, preferably ranged DPS or healers, to interact with the button below to prevent their release. However, this action imposes a 30-second debuff, High Voltage!, prohibiting further button interaction until it expires. Coordination is essential to designate players for successive button presses.
Even outside of these triggered events, bombs periodically emerge from all dispenser locations, necessitating swift elimination by ranged DPS to prevent player damage upon detonation, which leaves hazardous void zones on the ground.
Each phase presents distinct challenges:
Phase 1: Fire
This phase focuses on tank management, requiring the main tank to kite Thermaplugg during Furnace Surge while avoiding accumulating Sprocketfire stacks.
Phase 2: Frost
This phase puts pressure on healers to sustain the raid through Coolant Discharge while DPS races to transition phases, managing bomb spawns amidst accumulating Freezing stacks.
Phase 3: Poison
This phase requires positioning the boss centrally for healer accessibility and diligent interruption of Toxic Ventilation, alongside continued bomb management.
Phase 4 Ultimate
This final phase Intensifies the challenge by combining mechanics from previous phases, demanding adaptive bomb handling and readiness for tank mechanics like Sprocketfire Punch, Supercooled Smash, and Hazardous Hammer. The duration is extended, requiring sustained endurance to reduce Thermaplugg's health to zero.
Coordination, adaptability, and endurance are paramount for success in the multi-faceted encounter with Thermaplugg.
Gnomeregan Loot in Season of Discovery
After knowing what awaits you in the depths of Gnomeregan, you might be wondering what rewards will be bestowed upon players who go through the rade and defeat all of its challenges. In this portion of the guide we will take a look at some of the best loot you can get from this raid, as well as weapons and tier pieces. Woohoo! You've also found a special promo-code. Use BLOG7 to get 7% OFF on your first boosting service!

Tier Sets
In Gnomeregan, Tier Sets can be obtained by exchanging Tokens, following a system similar to later expansions. Unlike class-locked tokens, these are slot-specific. The Season of Discovery introduces nine Tier Sets from Gnomeregan, each comprising three pieces. These sets offer bonuses at both the 2- and 3-piece set levels. Notably, Irradiated Garments, although acquired from bosses, cannot be purchased with Tokens like the other sets.
Irradiated Garments [Cloth]
- 2 pieces: -5 Stamina.
- 2 pieces: Improves your chance to get a critical strike with melee and ranged attacks and with spells by 1%.
- 3 pieces: Increases damage and healing done by magical spells and effects by up to 11.
Set Pieces: Irradiated Robe, Irradiated Trousers, Irradiated Boots.
Hyperconductive Wizard's Attire [Cloth]
- 2 pieces: Improves your chance to hit with spells and with melee and ranged attacks by 1%.
- 2 pieces: +100 Armor.
- 3 pieces: Chance on spell cast to increase your damage and healing by up to 40 for 10 sec.
Set Pieces: Hyperconductive Robe, Hyperconductive Skirt, Hyperconductive Walkers.
Hyperconductive Mender's Meditation [Cloth]
- 2 pieces: +14 Spirit.
- 3 pieces: Restores 7 mana per 5 sec.
Set Pieces: Hyperconductive Shimmershirt, Hyperconductive Pantaloons, Hyperconductive Sandals.
Insulated Leathers [Leather]
- 2 pieces: Improves your chance to get a critical strike with melee and ranged attacks and with spells by 1%.
- 3 pieces: Increased Daggers +5.
- 3 pieces: +20 Attack Power in Cat, Bear, and Dire Bear forms only.
Set Pieces: Insulated Chestguard, Insulated Legguards, Insulated Workboots.
Insulated Sorcerer's Leathers [Leather]
- 2 pieces: Increases damage and healing done by magical spells and effects by up to 16.
- 3 pieces: Increases the critical hit chance of Wrath and Starfire by 2%.
Set Pieces: Insulated Apron, Insulated Leggings, Insulated Galoshes.
Electromantic Devastator's Mail [Mail]
- 2 pieces: +24 Attack Power.
- 3 pieces: Your attacks have a 5% chance of restoring 100 mana.
Set Pieces: Electromantic Chainmail, Electromantic Chausses, Electromantic Grounding Sabatons.
Electromantic Stormbringer's Mail [Mail]
- 2 pieces: Increases damage and healing done by magical spells and effects by up to 12.
- 3 pieces: -0.2 seconds on the casting time of your Lightning Bolt spell.
Set Pieces: Electromantic Chainshirt, Electromantic Gambeson, Electromantic Grounding Boots.
H.A.Z.A.R.D. Suit [Plate]
- 2 pieces: Increased Defense +7.
- 2 pieces: +16 Attack Power.
- 3 pieces: Improves your chance to hit with spells and with melee and ranged attacks by 1%.
Set Pieces: H.A.Z.A.R.D. Breastplate, H.A.Z.A.R.D. Legplates, H.A.Z.A.R.D. Boots.
Shockforged Warplate [Plate]
- 2 pieces: Increases damage and healing done by magical spells and effects by up to 12.
- 3 pieces: Increases the critical hit chance of Holy Shock by 2%.
Set Pieces: Shockforged Breastplate, Shockforged Legplates, Shockforged Battleboots.
Gnomeregan World Buff
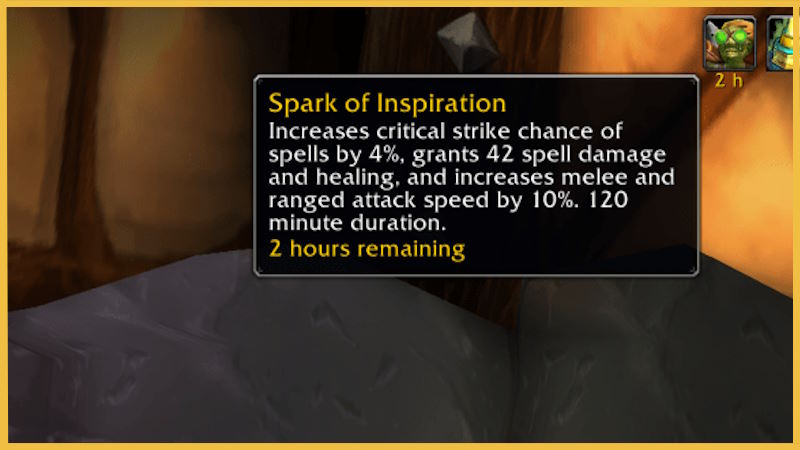
With the introduction of the new raid to Season of Discovery, a new World Buff was also added to the game. The name of the buff is “Spark of Inspiration”, and it does this: “Increases critical strike chance of spells by four percent, grants 42 spell damage and healing, and increases melee and ranged attack speed by 10 percent. 120 minute duration.” It is also worth noting, that the world buff from the previous raid – Blackfathom Deeps will not work for Gnomeregan and content after BFD going forward.
Currently, it is unknown how exactly the buff is acquired, but this guide will be updated as soon as more information becomes available.
This wraps up this Gnomeregan guide, if you want to receive some of the amazing rewards mentioned above, or can’t find a professional team to clear the content with – we are always ready to help. You can check out our Gnomeregan services here if you are interested.

Starts at
$74$84

Starts at
$3.5$7
Starts at
$0.07$0.19
Starts at
$229$319
Starts at
$92$143

Starts at
$12

Core Principles
Why Choose Us?
We are constantly improving our services to deliver mind-blowing experiences to our customers for every order, every day
Rated 5 Stars
On REVIEWS.io
Check out our reviews on REVIEWS.io, an independent reviews platform. All reviews are genuine and published in real time.
Read customer reviews
We will contact you and start working on your order within 7 minutes

Every manager, even the owner, has successfully personally completed over 300 orders

P.S. We'd better miss a $10,000 sale, than risk your account